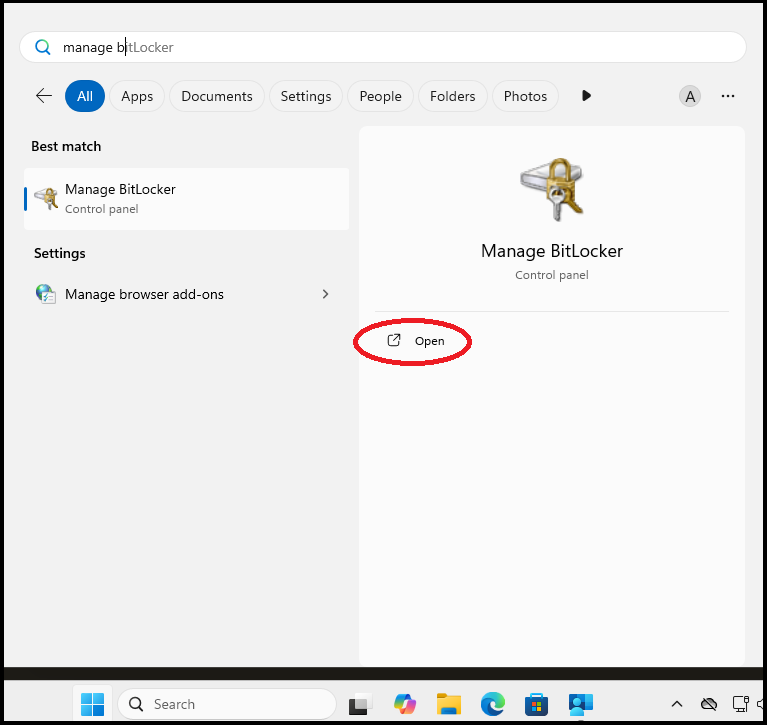
1. Press the Windows Key on the keyboard, then type in 'Manage Bit', in the search results on the right will be 'Manage BitLocker'. Click on 'Open'.
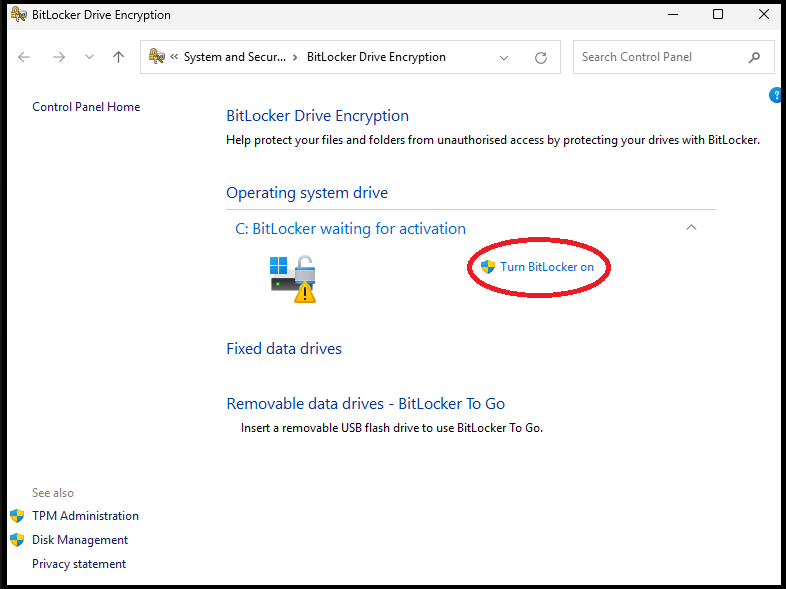
2. In this example, it shows that BitLocker is waiting for activation, if this is the same for you click on 'Turn BitLocker on'.
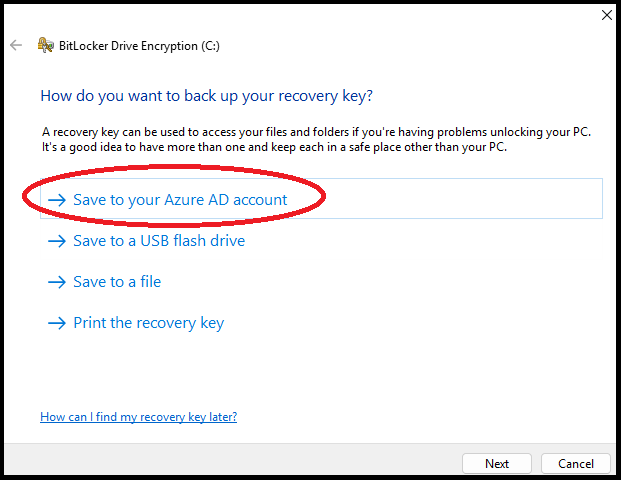
3. Click on 'Save to your Azure AD account', then on 'Next'.
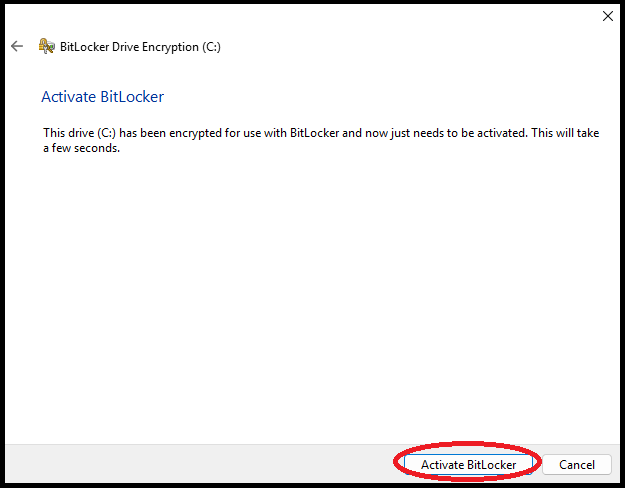
4. You may get a message saying that it has successfully saved the information, if so, click on 'Next'. Otherwise, it will say that it is now ready to encrypt the drive. Click on 'Activate BitLocker'.
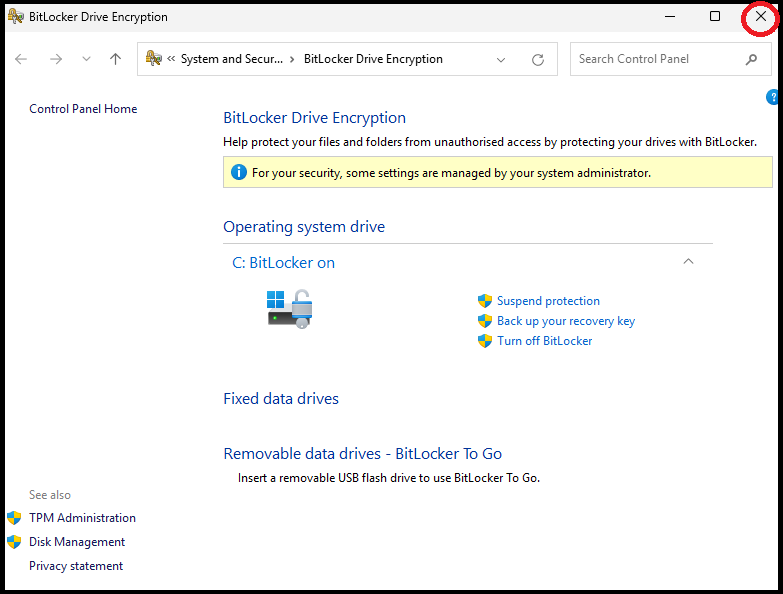
5. BitLocker should now be shown as on. Close the window to return to Company Portal.
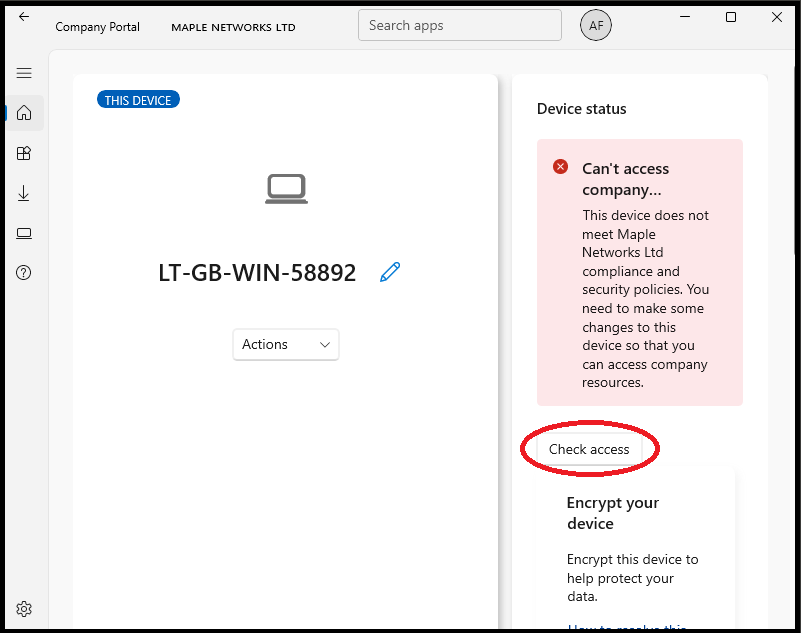
6.Click on 'Check access'. It can take several minutes for it to complete the check.
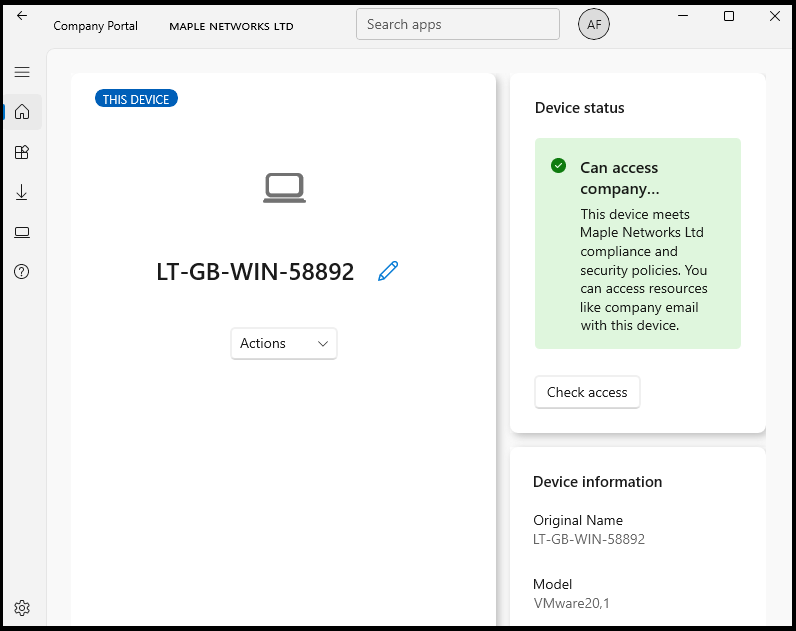
7. Once the check has completed, it should show in green that your laptop can now access company resources.
As your laptop is now compliant, click here to see the next steps.